Stretching alone can be limiting — it’s difficult to fully relax a muscle while also deepening the stretch. That’s where PNF stretching comes in. Short for Proprioceptive Neuromuscular Facilitation, this advanced technique combines stretching and muscle contraction to help you achieve greater flexibility, relieve chronic tension, and improve mobility.
This guide will walk you through the different types of PNF stretching exercises, how they work, and why partnering with a trained professional (like a StretchMed Flexologist) delivers the best results.
Key Takeaways
- PNF uses a contract-then-relax method: By briefly contracting a muscle before stretching it, you signal the body to relax and lengthen it more effectively.
- Warm muscles and communication are crucial: Always start with 5–10 minutes of light movement, and never push into sharp pain.
- Professional assistance maximizes safety and progress: A trained specialist ensures proper form, resistance, and alignment for optimal results.
What Is PNF Stretching?
PNF stretching is a method that improves flexibility by combining muscle contractions and passive stretching. Originally developed for rehabilitation, it’s now widely used by athletes, dancers, and anyone seeking improved range of motion.
Unlike static stretching (simply holding a position), PNF uses active muscle engagement and relaxation to “teach” your nervous system to allow greater flexibility safely.
Learn more about assisted stretching techniques on our Stretching Services page.
How PNF Works With Your Nervous System
When you stretch, your muscles send protective signals to prevent overstretching. PNF works by temporarily overriding this reflex. After contracting a muscle, your body allows it to relax more deeply — creating a “window” for a safe, deeper stretch.
This is why PNF stretching feels immediately more effective than traditional methods — it works with your body, not against it.
Types of PNF Stretching Techniques
1. Hold–Relax
Move into a light stretch for 10 seconds, then contract the target muscle isometrically (pushing without moving) for 6 seconds. Relax and allow the muscle to stretch deeper for 30 seconds.
2. Contract–Relax
After a brief stretch, actively move the muscle through its range of motion against resistance. This builds flexibility and strength.
3. Hold–Relax–Contract
Adds one more step: after contracting and relaxing, you engage the opposing muscle to pull yourself deeper into the stretch — ideal for advanced flexibility.
Why PNF Stretching Is So Effective
- Increases flexibility faster than static stretching
-
Improves muscle coordination and body awareness
-
Reduces chronic pain caused by tight muscles
-
Enhances athletic performance and recovery
-
Relieves stiffness in common problem areas like the hamstrings, hips, and shoulders
Want to see these benefits firsthand? Book a 1-on-1 assisted stretch with one of our trained professionals.
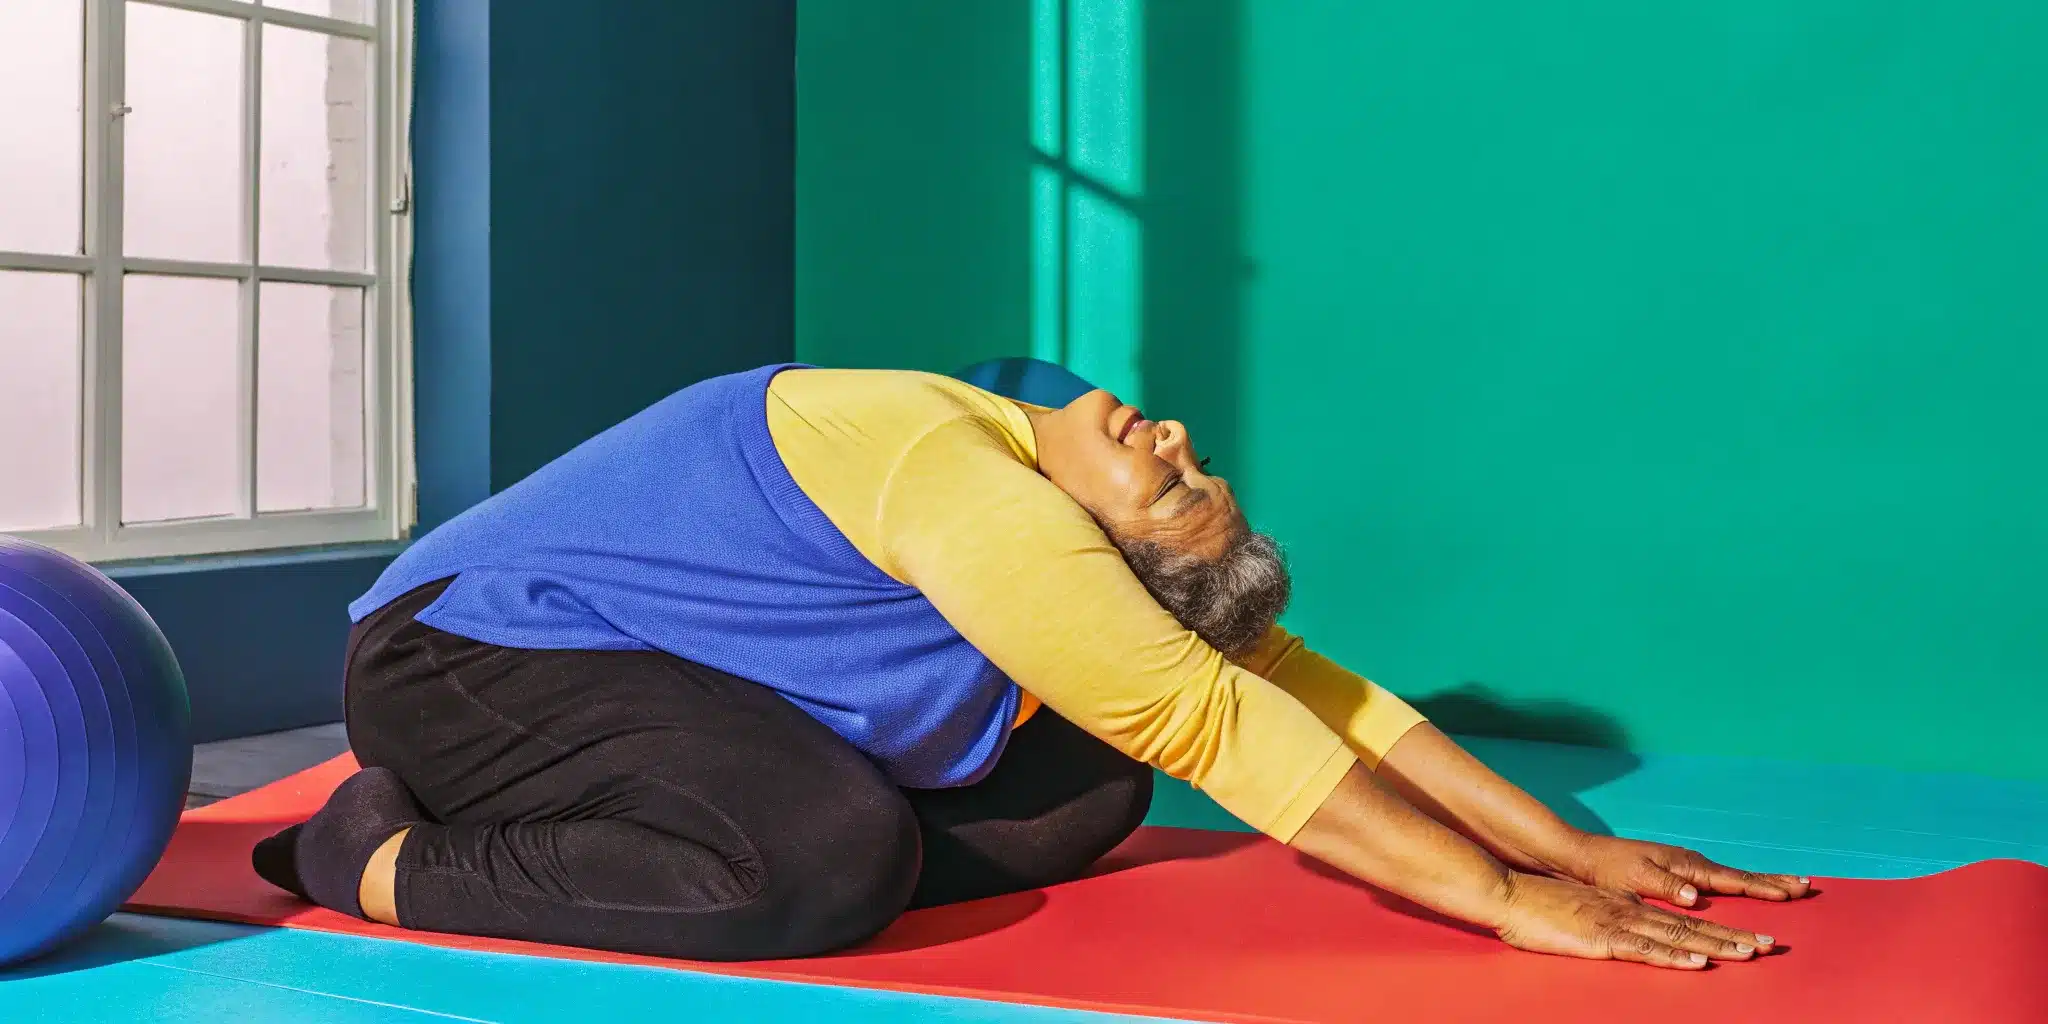
Simple PNF Stretches to Try
Hamstring Stretch
Lie on your back, and have a partner raise one leg until you feel a gentle pull. Push against their resistance for 6 seconds, then relax as they move your leg slightly higher. Repeat 3–5 times.
Quad & Hip Flexor Stretch
Stand on one leg, grab your other foot, and pull it toward your glutes. Contract your quad by pushing against your hand for a few seconds, then relax and deepen the stretch.
Triceps Stretch
Raise one arm, bend it behind your head, and gently pull your elbow with the opposite hand. Contract, hold, then relax for a deeper stretch.
For a safer, guided experience, visit a nearby StretchMed Studio and let our certified Flexologists assist you.
PNF Stretching Safety Tips
-
Warm up first: A 5–10 minute cardio warm-up (like brisk walking) prevents injuries.
-
Avoid pain: You should feel a strong stretch, not sharp pain.
-
Breathe deeply: Inhale before contracting; exhale during the relaxation phase.
-
Communicate clearly: If working with a partner or professional, speak up to maintain safe intensity levels.
How to Incorporate PNF Into Your Routine
-
Frequency: 2–3 sessions per week (non-consecutive days)
-
Duration: 15–20 minutes per session targeting major muscle groups
-
Best time: After workouts or on recovery days when muscles are warm
Consistency leads to noticeable gains in mobility, flexibility, and comfort in daily movement.
Why Work With a StretchMed Professional
At StretchMed Studios, our certified Flexologists specialize in PNF-assisted stretching that’s safe, effective, and fully customized to your body.
Working with a professional helps you:
-
Prevent strain and injury
-
Achieve deeper, longer-lasting results
-
Address chronic pain and postural imbalances
Learn more about StretchMed’s mission to help you move better.
Explore our Assisted Stretching Programs to learn how we personalize advanced stretches for athletes and rehabilitation.
The Step-by-Step PNF Process
While it might sound complex, the PNF process is quite systematic. There are three main techniques you’ll encounter, each with a slightly different approach to contracting and relaxing the muscle.
- Hold-Relax: You’ll start by moving into a gentle stretch and holding it for about 10 seconds. Then, you’ll isometrically contract that muscle (pushing against a partner or a strap without actually moving) for about 6 seconds. Finally, you relax and allow the muscle to be stretched further for 30 seconds.
- Contract-Relax: This is similar to hold-relax, but during the contraction phase, you’ll move the muscle through its full range of motion against resistance.
- Hold-Relax-Contract: This method adds one more step. After the initial hold and contraction, you actively use the opposing muscle to pull yourself deeper into the stretch.
Each PNF technique is designed to maximize your flexibility gains in a short amount of time.
How It Eases Chronic Pain and Improves Mobility
One of the most powerful benefits of PNF stretching is its ability to address chronic pain and stiffness. By improving muscle elasticity and joint range of motion, PNF can provide significant relief. For instance, studies have shown that a consistent PNF program can effectively reduce chronic lower back pain. When your muscles are tight, they can pull on your joints and create imbalances that lead to discomfort. PNF helps release that chronic tension, particularly in areas like the hamstrings, hips, and shoulders, which are common culprits for pain. This improved flexibility translates directly to better mobility, making everyday movements like bending over, reaching for something, or even just walking feel easier and more fluid.
Key PNF Stretching Techniques to Know
PNF stretching might sound technical, but the ideas behind the different methods are actually quite simple. Think of them as different conversations you can have with your muscles to convince them to let go of tension. Each technique uses a specific sequence of stretching and contracting to help you achieve a deeper, more effective release. Understanding these core methods will help you get the most out of every session, whether you’re working with a professional or learning the basics on your own.
The Hold-Relax Technique
This is one of the most common PNF methods and a great place to start. It works in a simple, three-step process. First, a partner will gently move you into a passive stretch until you feel light tension in the muscle—let’s say your hamstring. You’ll hold that position for about 10 seconds. Next, you’ll contract that same hamstring by pushing against your partner’s hand without actually moving your leg. This is called an isometric contraction. After holding that contraction for about six seconds, you’ll relax, take a deep breath out, and your partner will gently guide you into a deeper stretch for about 30 seconds. You’ll be amazed at how much further you can go.
The Contract-Relax Method
The contract-relax method is a close cousin to the hold-relax technique, but with one key difference. It involves moving the muscle through its range of motion against resistance. Following the same hamstring example, after the initial passive stretch, you would actively push your leg down against your partner’s resistance, moving it through its full range of motion. This type of muscle work is known as an isotonic contraction. After the contraction, you relax, and your partner helps you find a new, deeper stretch. This method is fantastic for targeting specific muscle groups and improving both flexibility and strength at the same time.
The Hold-Relax-Contract Approach
If you’re looking for an even deeper release, the hold-relax-contract approach adds one more step to the process. It starts just like the hold-relax technique: a passive stretch, followed by an isometric contraction of the target muscle (your hamstring). But after you relax, you’ll actively engage the opposing muscle—in this case, your quadriceps and hip flexors—to pull yourself deeper into the stretch. Your partner will assist by supporting your leg as you move. This extra step uses your own strength to increase the stretch, further signaling to your nervous system that it’s safe to release the tension.
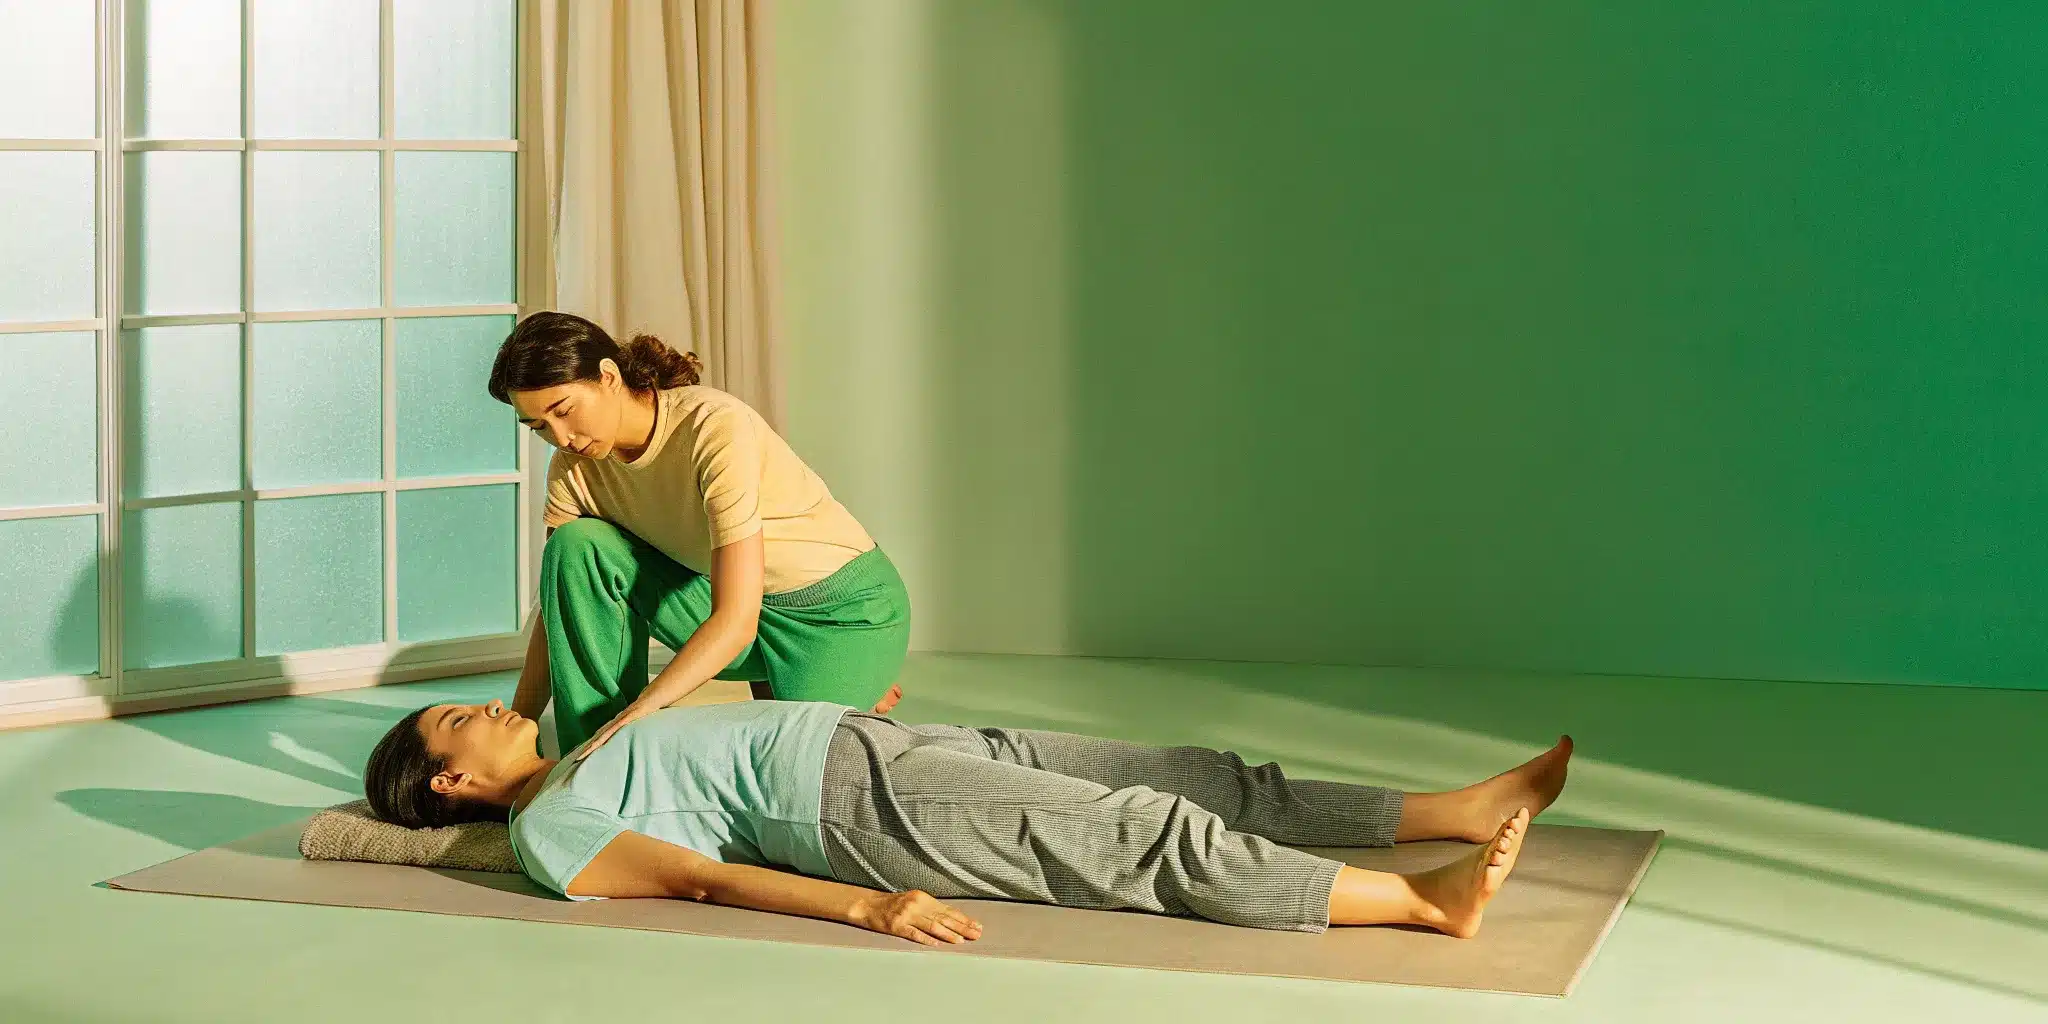
Stretching With a Partner vs. On Your Own
While you can perform some PNF stretches solo using a wall or a strap, working with a partner—especially a trained professional—is a game-changer. A partner can provide the precise amount of resistance needed for the contraction phase and can safely guide you into a deeper stretch than you could achieve on your own. This external support ensures you maintain proper form, preventing injury and maximizing results. This assisted approach often leads to greater flexibility gains because it allows your muscles to fully relax while your partner supports your limb.
How to Breathe and Time Your Stretches
Your breath is one of the most powerful tools you have for releasing muscle tension. During PNF stretching, focus on maintaining slow, deep, and calm breathing. A good pattern to follow is to inhale as you prepare for the contraction, hold your breath briefly during the muscle squeeze, and then perform a long, full exhale as you relax and move into the deeper stretch. This deep exhalation is key—it signals to your nervous system to let go. As for timing, a good general rule is to hold the initial stretch for 10 seconds, contract for 6 seconds, and then relax into the final developmental stretch for 30 seconds.
How to Practice PNF Stretching Safely
PNF stretching is an incredibly effective way to increase your flexibility and ease muscle tension, but its power comes with a responsibility to practice it correctly. Because you’re actively engaging your muscles, there’s a bit more to it than a simple static stretch. Think of it less like a casual lean and more like a coordinated dance with your own body. Getting the technique right isn’t just about getting better results—it’s about preventing strains, tears, and other injuries. By following a few key safety guidelines, you can make sure your PNF routine is a source of relief and progress, not pain.
Why You Need to Warm Up First
Jumping straight into an intense stretch with cold muscles is a recipe for injury. Your muscles are more pliable and responsive when they’re warm, which is why a proper warm-up is non-negotiable before any PNF session. A good warm-up increases blood flow to your muscles, preparing them for the work ahead. This doesn’t have to be complicated—five to ten minutes of light cardio is perfect. Think brisk walking, jogging in place, or cycling on a stationary bike. The goal is to gently raise your body temperature and get your heart rate up slightly. This simple step makes a huge difference in how your body responds to the stretch and significantly reduces your risk of injury.
Getting Your Form and Setup Right
Proper form is everything in PNF stretching. Because it involves contracting and relaxing muscles, you need to be mindful of your body’s signals. Never push into sharp pain; you should feel a strong stretch, but it shouldn’t be agonizing. One of the biggest mistakes is skipping the relaxation phase. After you contract the muscle, you must give it a moment to fully release before you deepen the stretch. This is where the magic happens! Also, make sure your setup is stable. Whether you’re using a strap, a wall, or a partner, you should feel secure and supported so you can focus on the muscle you’re targeting without tensing up elsewhere.
Communicating Clearly With Your Partner
If you’re doing PNF with a partner, communication is your most important tool. You are the only one who knows what you’re feeling, so you need to be vocal. Your partner can’t read your mind, and what looks like a good stretch from the outside might be too intense for you. Use clear and simple cues. Phrases like “a little more,” “hold it there,” or “that’s too much” are essential. It’s a constant dialogue. Effective communication ensures that your partner can apply the right amount of pressure and adjust as needed, creating a safe and productive experience for both of you. This feedback loop is what makes assisted stretching so effective.
When to Skip PNF Stretching
PNF is fantastic, but it’s not always the right choice. There are specific times when you should opt for a different type of stretch or skip it altogether. If you have an acute injury, like a recent muscle tear or sprain, PNF is off the table until you’re healed. It’s also wise to avoid PNF right before an activity that requires maximal strength, like heavy weightlifting, as it can temporarily decrease your muscle’s power output. If you have certain health conditions, such as osteoporosis or joint hypermobility, it’s best to check with your doctor first. And, of course, if you’re feeling unwell or unusually fatigued, listen to your body and give it a rest.
The Benefits of Working With a Professional
While you can perform some PNF stretches on your own, working with a trained professional is the safest and most effective way to learn the technique. A certified stretch therapist or physical therapist can guide you through the movements with precise form, ensuring you’re targeting the right muscles without putting undue stress on your joints. They can also provide the resistance for you, which often allows for a deeper, more effective stretch than you could achieve alone. For anyone new to PNF or dealing with chronic pain, professional guidance is invaluable. A professional can help you avoid common mistakes and tailor a routine specifically for your body’s needs.
Simple PNF Stretches to Get You Started
Ready to see what PNF feels like in your own body? These simple stretches target some of the most common areas of tightness, from your legs to your lower back. While you can adapt some of these to do on your own, PNF is most effective and safest when performed with a partner who can provide resistance and guide you into a deeper stretch.
Remember, communication is everything. Your partner needs to know how you’re feeling so they don’t push you too far. The goal is to feel a good, deep stretch, not sharp pain. If something hurts, stop immediately. Think of this as a conversation between you, your partner, and your muscles. When you’re ready, find a comfortable spot, and let’s begin.
PNF Stretches for Hamstrings
If you spend a lot of time sitting for work or driving, your hamstrings are probably calling out for a good stretch. This Contract-Relax technique is fantastic for releasing that tension.
Start by lying on your back with both legs straight. Have a partner slowly lift one leg toward the ceiling until you feel a gentle stretch in the back of your thigh. Now, gently push your leg against your partner’s hand as if you’re trying to lower it back down. Hold this contraction for about 7–15 seconds without actually moving your leg. Then, completely relax. As you relax, your partner will guide your leg a little further into the stretch. Repeat this cycle 3–5 times.
Techniques for Quads and Hip Flexors
Now for the front of your legs. Tight quads and hip flexors can contribute to lower back pain and poor posture, so giving them some attention is key. For this stretch, you’ll use the Hold-Relax method.
Stand on one leg, holding onto a wall or chair for balance. Grab your other foot and pull it toward your glute until you feel a stretch in the front of your thigh. Hold this position, then isometrically contract your quad by trying to push your foot forward against your hand for 7–15 seconds. Relax the muscle completely, and then gently pull your foot a little closer to your glute to deepen the stretch. This movement is a great way to improve the flexibility of your hip flexors, too.
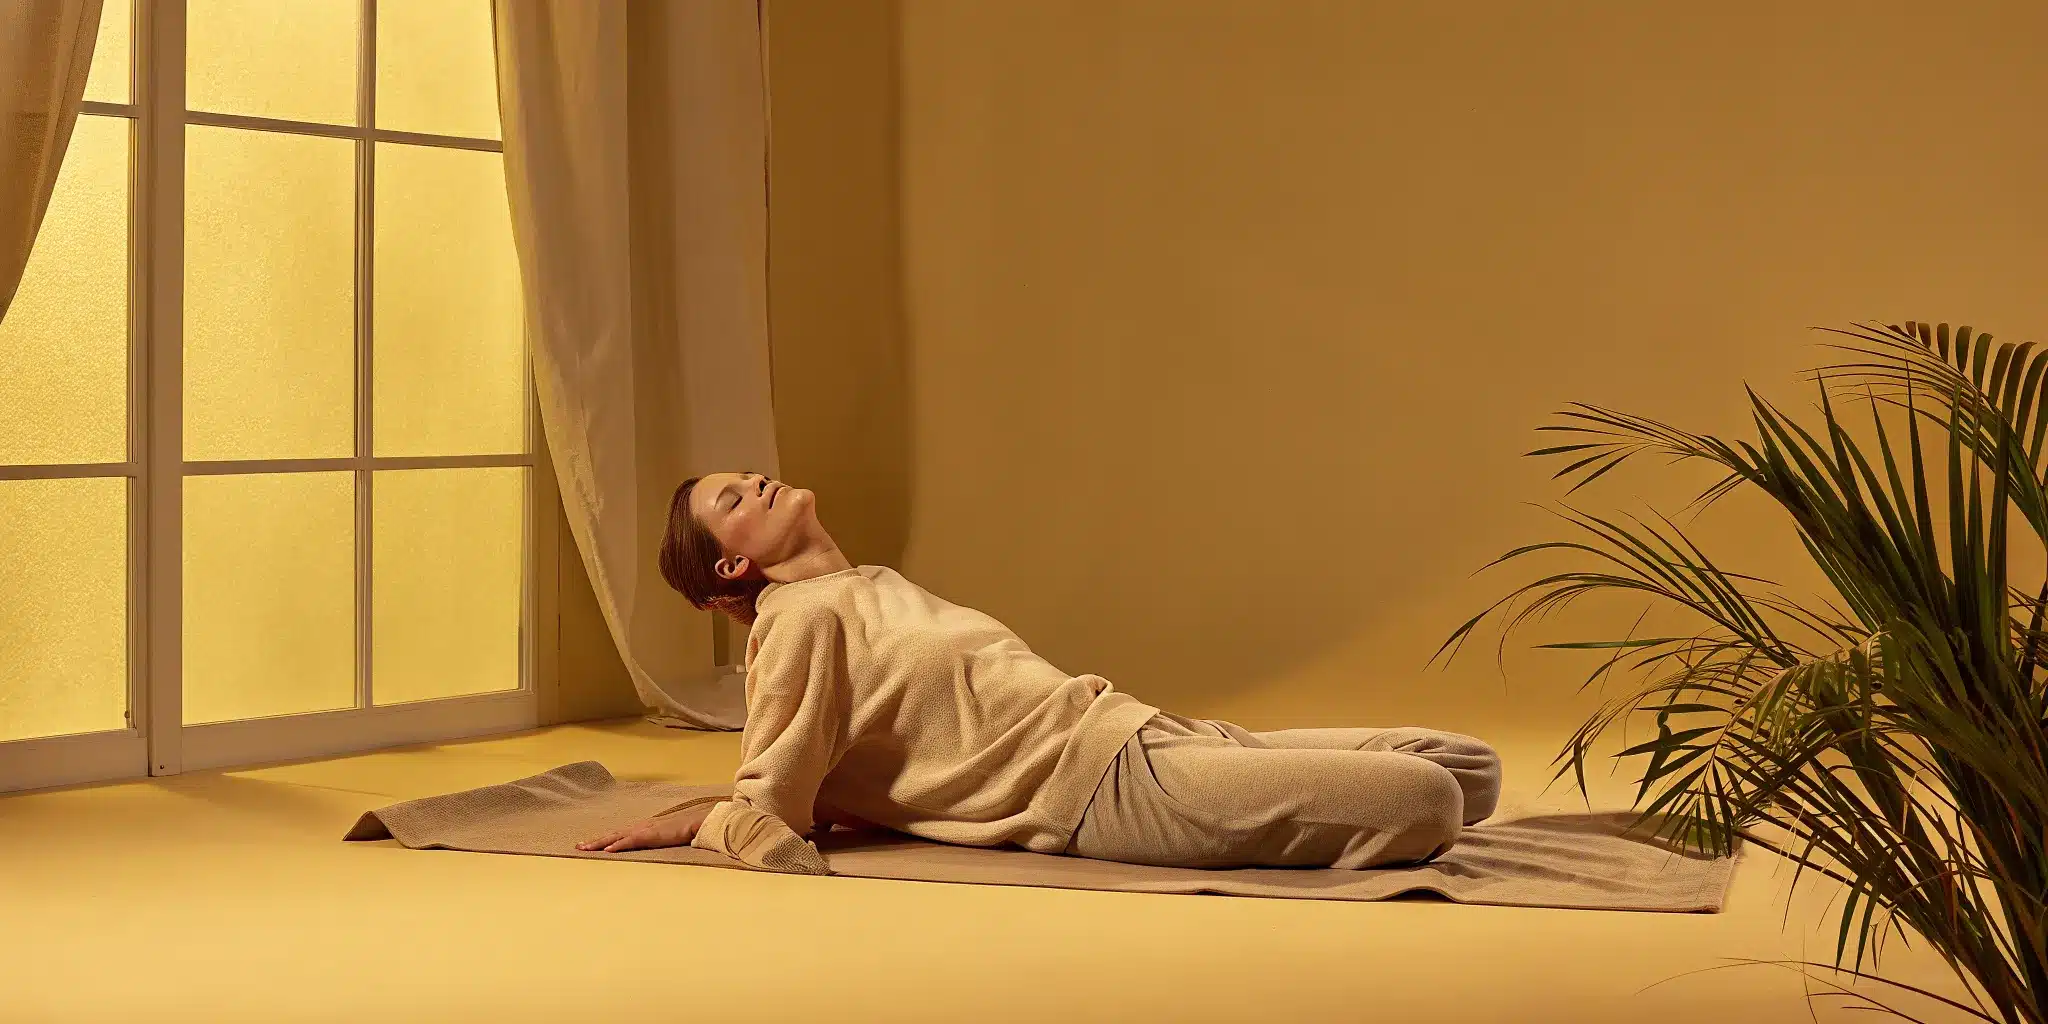
PNF Stretches for the Upper Body
Tension doesn’t just live in our legs; it can build up in our shoulders and arms from typing, lifting, or even stress. This triceps stretch can help open up your entire shoulder girdle.
Raise one arm straight overhead, then bend your elbow so your hand is behind your head. Use your opposite hand to gently pull your elbow until you feel a stretch in your triceps. Hold that position, and then push your elbow against your hand’s resistance for 7–15 seconds. After the contraction, relax and allow your hand to guide the elbow a bit further into the stretch. You’ll be surprised how much more range of motion you can find with this simple technique.
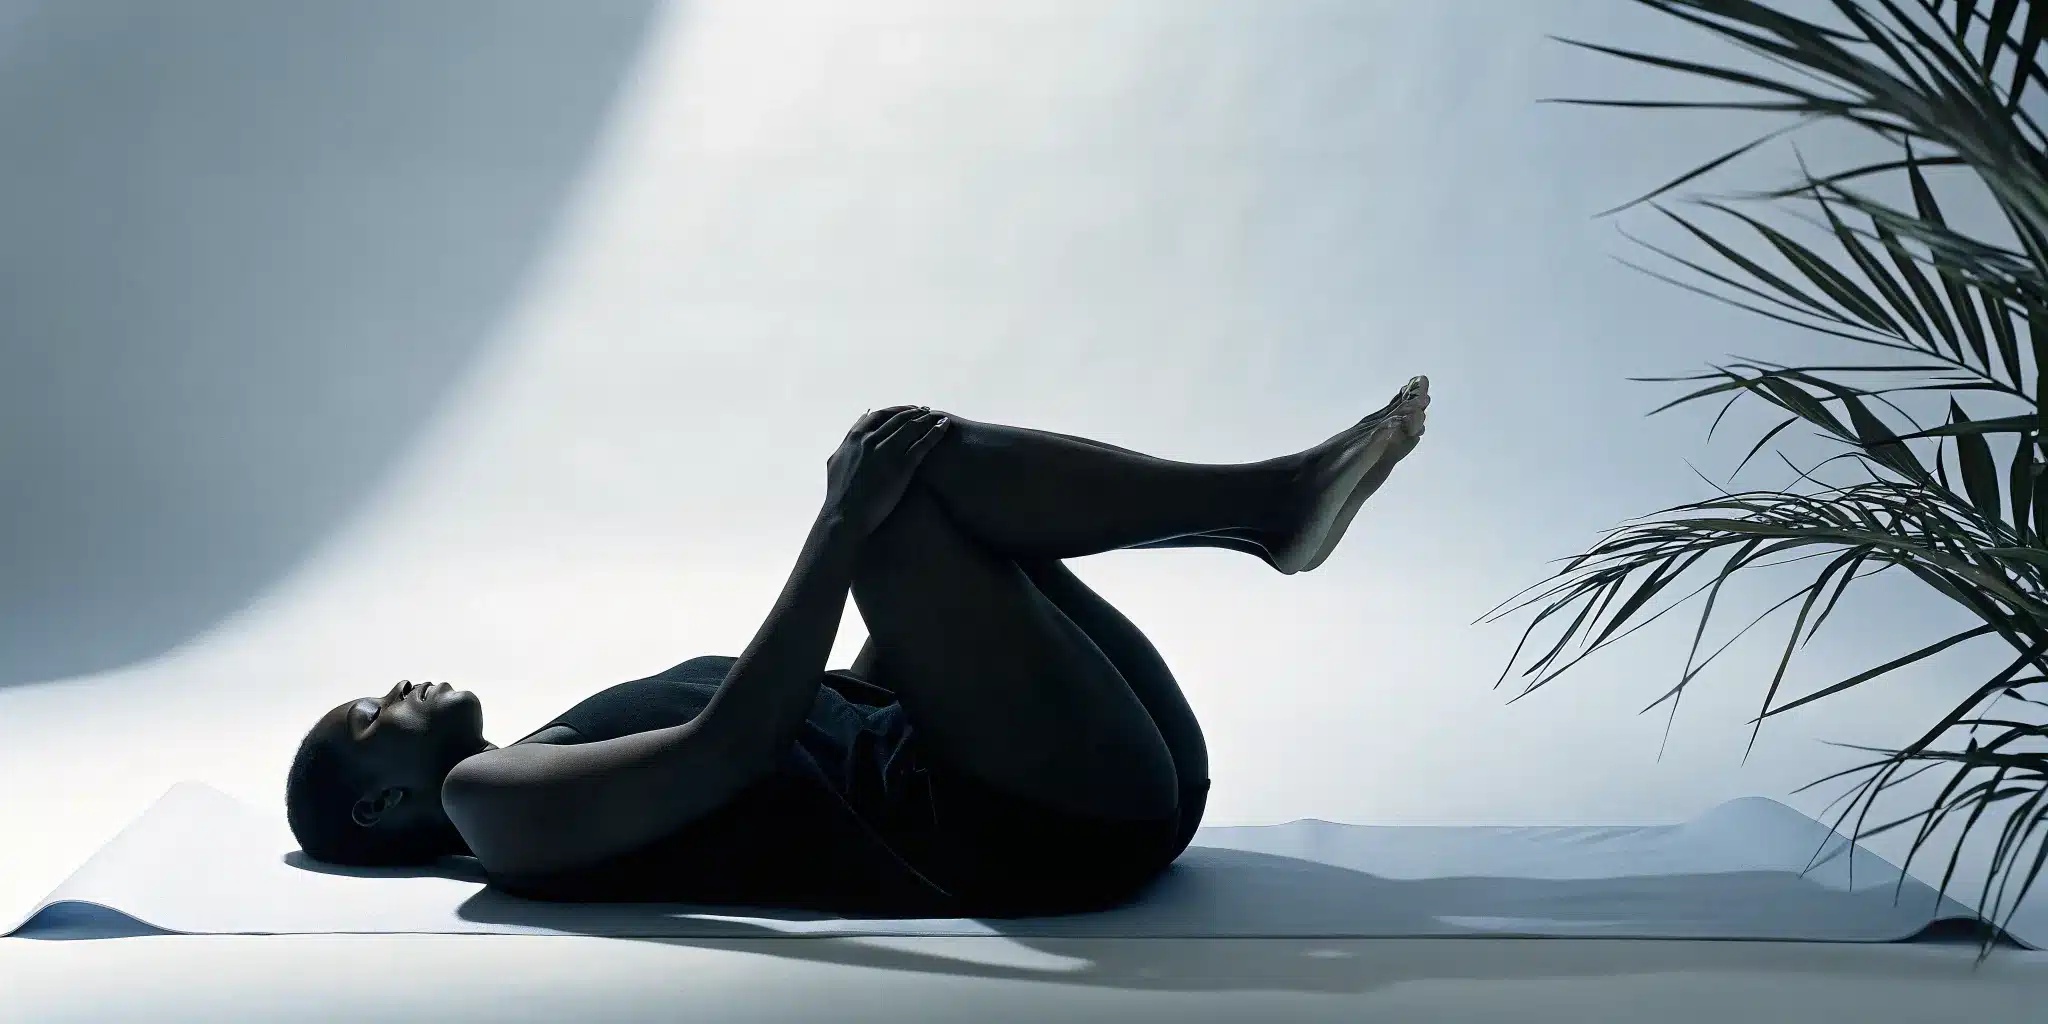
Movements for Your Core and Lower Back
A tight, achy lower back is one of the most common complaints out there. This gentle PNF stretch can provide some much-needed relief.
Lie on your back and gently pull both of your knees to your chest, wrapping your hands around them. This is your starting stretch. From here, gently try to push your knees away from you, using your hands to provide resistance so your legs don’t actually move. Hold this gentle push for 7–15 seconds. Then, release the contraction, take a deep breath out, and hug your knees a little closer to your chest. This is a safe and effective way to manage lower back pain and release built-up tension.
Focusing on Proper Form
As you try these stretches, your top priority should always be safety. Proper form ensures you’re stretching the right muscle without putting unnecessary strain on your joints or ligaments. Always keep your body in a stable position and focus on your breathing—inhale before you contract and exhale as you relax and deepen the stretch.
Most importantly, listen to your body. A stretch should feel like a release, not a strain. If you feel any sharp or shooting pain, back off immediately. Avoiding common stretching mistakes is crucial for preventing injury. While a partner can help, working with a trained professional is the best way to guarantee your form is perfect and you’re getting the most out of every movement.
Ready for More? Advanced PNF Techniques
Once you’ve gotten the hang of the basic PNF techniques and feel comfortable with the process, you might find yourself wondering, “What’s next?” If you’re ready to take your flexibility to a new level, it’s time to explore more advanced PNF applications. Moving into advanced techniques isn’t about pushing through pain or forcing a stretch. Instead, it’s about applying the same principles of muscle contraction and relaxation to more complex movement patterns and stubborn areas of tightness.
These advanced methods are fantastic for breaking through flexibility plateaus and can make a significant difference in your daily life and athletic performance. Think of it as fine-tuning your body’s movement. By targeting specific muscle chains and integrating PNF into more dynamic motions, you can unlock a greater range of motion and achieve a new sense of freedom in your body. Below, we’ll look at how you can apply advanced PNF to your upper body, lower body, and even your warm-up routines.
Complex Movements for the Upper Body
From reaching for a book on a high shelf to swinging a golf club, your upper body performs complex movements that involve multiple muscles working together. Advanced PNF techniques can target these entire movement patterns, not just a single muscle. For example, instead of only focusing on your bicep, you can use a PNF stretch that incorporates your shoulder, chest, and arm to improve your ability to reach overhead. Techniques like ‘Hold-Relax’ and ‘Contract-Relax’ are especially effective for enhancing flexibility in the shoulders and arms, allowing you to move more freely and with less strain during your daily activities.
Progressive Lower Body Stretches
If you feel like your lower body flexibility has hit a wall, progressive PNF stretches can help you move past it. This approach focuses on systematically deepening your stretches over time. For chronically tight areas like the hamstrings, the ‘Contract-Relax’ technique can be a game-changer. After holding a standard hamstring stretch, you’ll contract the muscle against resistance (from a partner or a strap) and then relax into a deeper stretch. This process helps the nervous system allow the muscle to lengthen further than it normally would, making it a powerful tool for increasing flexibility in your hamstrings, quads, and hip flexors.
Integrating PNF into Dynamic Movements
PNF stretching isn’t just for your post-workout cool-down. You can also integrate it into your warm-up to prepare your body for activity. Using PNF before you exercise can improve muscle coordination and control, which is essential for dynamic sports like tennis, running, or dancing. For instance, a runner might use a PNF technique for their hip flexors to encourage a longer, more efficient stride. By activating and lengthening the muscles before you start moving, you’re essentially telling your body that it’s safe to move through a fuller range of motion, which can lead to better performance.
Why Professional Guidance Matters for Advanced Moves
As you venture into more complex PNF techniques, the potential for error increases. This is where working with a professional becomes so important. A trained stretch therapist understands the intricate details of anatomy and can ensure you’re performing each movement safely and effectively. They can apply the precise amount of resistance needed and guide you into a stretch without putting undue stress on your joints or ligaments. Seeking professional guidance is the smartest way to explore advanced PNF, as it minimizes your risk of injury while maximizing the incredible benefits these techniques have to offer.
How to Create Your PNF Stretching Routine
Building a PNF stretching routine is all about consistency. Think of it less as another task on your to-do list and more as a dedicated time to connect with your body and work toward moving with more freedom and less pain. Creating a simple, repeatable plan is the best way to see real, lasting results. Here’s how you can structure your routine for success.
How Often and For How Long Should You Stretch?
When it comes to PNF stretching, quality and consistency trump quantity. You don’t need to do it every day to feel a difference. For the best results, aim to incorporate a PNF session into your schedule two to three times a week on non-consecutive days. This gives your muscles time to adapt and recover. A focused session targeting major muscle groups might take 15 to 20 minutes. Each individual stretch cycle—the contraction, the relaxation, and the deeper stretch—will only take about 30 seconds, so you can accomplish a lot in a short amount of time by following a consistent schedule.
Preparing for Your Stretching Session
Setting yourself up properly before you begin is crucial for both safety and effectiveness. PNF stretching is most effective when your muscles are warm, so it’s best to do it after a workout or on a rest day following some light activity like a brisk walk. Never stretch cold muscles. Most importantly, if you’re new to this technique or have a history of injuries, it’s wise to get professional guidance. Consulting with a professional like a physical therapist or a certified stretch practitioner ensures you’re performing the movements correctly and safely, which is key to preventing further injury and getting the results you want.
What to Do After You Stretch
What you do after your session is just as important as the stretching itself. Once you’ve finished, give your body a moment to integrate the changes. Avoid jumping right into a high-intensity activity. Instead, focus on gentle movement and hydration to support your muscles as they recover. The goal of a cool-down period is to allow your nervous system to relax and your muscles to settle into their new, extended range of motion. Proper muscle recovery helps solidify the flexibility gains you just worked for and reduces the chance of soreness the next day.
How to Track Your Progress
One of the most rewarding parts of PNF stretching is that you can often see immediate results within a single session. When performed correctly, you might notice a noticeable increase in your range of motion each time you move deeper into the stretch. To track your progress over time, you can take photos or use a measuring tape to see how far you can reach. But remember, progress isn’t just measured in inches. Pay attention to how your body feels. Are daily movements like bending down or reaching overhead becoming easier? Is your chronic pain subsiding? These are the most important indicators that your routine is working.
Adding PNF to Your Current Fitness Routine
PNF stretching fits beautifully into almost any existing fitness plan. Because it’s best done with warm muscles, the ideal time to practice it is after your main workout. Whether you’re a runner, a weightlifter, or a yoga enthusiast, adding 15 minutes of PNF stretching at the end of your session can help improve your overall flexibility and speed up recovery. If you are working through an injury, it’s especially important to integrate PNF with professional guidance. A physical therapist can tailor a routine that supports your healing process, ensuring each stretch helps you move closer to a full, pain-free recovery.
Get the Most Out of Every PNF Stretch
Once you understand the basics of PNF, you can focus on refining your technique to get the best results. Like any form of exercise, the details matter. Paying attention to your breathing, form, and timing will help you deepen your stretches safely and effectively, leading to greater flexibility and pain relief. It’s all about working smarter, not harder, to help your muscles relax and lengthen. These small adjustments can make a huge difference in your progress and help you build a sustainable stretching practice that feels great.
Tips for Stretching With a Partner
Since PNF stretching relies on an external force for resistance and the passive stretch, it’s often most effective when done with a partner. Clear communication is everything here. Before you start, agree on a signal to stop or ease up if the stretch becomes too intense—a simple “stop” or a tap on the arm works well. Your partner’s job is to provide steady resistance, not to force your body into a position it isn’t ready for. They should listen to your feedback and adjust accordingly. This teamwork ensures you can fully relax into the stretch without worrying about overdoing it, making the entire experience safer and more productive.
Master Your Breathing Technique
Your breath is one of the most powerful tools you have for a successful stretch. During any PNF sequence, focus on taking slow, deep, and calm breaths. Inhale as you prepare, and exhale fully as you move into the passive stretch or as your partner deepens it for you. Deep breathing signals to your nervous system that it’s safe to relax, which in turn helps release tension in your muscles. If you hold your breath, your muscles will instinctively tense up, fighting against the stretch. By coordinating your breath with the movement, you encourage your body to let go, allowing for a much deeper and more effective release.
Fine-Tuning Your Form
Proper form is non-negotiable for preventing injury and getting the results you want. The goal is to isolate and relax the specific muscle you’re targeting. Before you even begin the contraction phase, make sure you’re in a stable and comfortable position. As you move through the stretch, pay close attention to what your body is telling you. You should feel a strong pull, but never sharp pain. If you feel pain, you’ve gone too far. Using proper form and technique ensures that you’re stretching the muscle, not straining a tendon or joint, which is key for long-term mobility and health.
Common PNF Mistakes (And How to Fix Them)
Two common missteps can limit your PNF results. The first is skipping a proper warm-up. Your muscles stretch much more safely and effectively when they’re warm, so spend at least five to ten minutes doing light cardio like walking or cycling before you start. The second mistake is rushing the relaxation phase. After you contract the muscle, you have to give it a moment to fully let go before moving into the deeper passive stretch. Failing to allow the muscle to relax makes the whole process less effective. The fix is simple: be patient, take a deep breath, and wait for that feeling of release.
How to Know It’s Working: Signs of Progress
The feedback from PNF stretching is often immediate and satisfying. When you perform a sequence correctly, you should notice a significant increase in your range of motion right away. For example, after completing a hold-relax cycle for your hamstrings, you should be able to reach noticeably further in the next passive stretch. This isn’t just a feeling; it’s a measurable change. Over time, you’ll see these immediate gains turn into lasting flexibility. Tracking this progress—whether by taking photos or just noting how much easier daily movements become—is a fantastic way to stay motivated and see just how powerful this technique can be.
Related Articles
- StretchMed 1-on-1 Assisted Stretching for Pain & Mobility
- STRETCHMED – Committed To Helping You Move Well
- Blog – STRETCHMED
Frequently Asked Questions
How is PNF different from the regular stretching I already do?
Think of regular static stretching as a monologue where you tell your muscle to lengthen. PNF stretching, on the other hand, is a dialogue. You actively contract the muscle first, which sends a signal to your nervous system to relax it more deeply than it normally would. This conversation allows you to achieve a greater range of motion more efficiently than just holding a stretch and waiting.
Can I do PNF stretching on my own, or do I need a partner?
While you can use tools like straps or a wall to perform some PNF stretches by yourself, it’s a completely different experience with a partner. A partner, especially a trained professional, can provide the perfect amount of resistance and guide you into a deeper, safer stretch than you could manage alone. This assistance helps you relax completely, which is essential for getting the best results.
Should PNF stretching feel painful?
Absolutely not. You should feel a strong, deep stretch—a sensation of tension releasing—but never sharp or shooting pain. Pain is your body’s signal that you’re pushing too far, too fast. Clear communication is key, especially with a partner, to ensure the pressure is productive, not painful. If you feel anything that hurts, you should immediately back off.
How often should I practice PNF to see a real difference?
Consistency is more important than frequency. You don’t need to do it every single day. Aim for two to three sessions a week on non-consecutive days to give your muscles time to recover and adapt. A focused 15- to 20-minute session is plenty of time to work through the major muscle groups and make significant progress.
How soon can I expect to see results from PNF stretching?
One of the most rewarding things about PNF is that you can often feel a difference within a single session. You’ll likely notice an immediate increase in your range of motion right after completing a stretch cycle. Over time, with a consistent routine, these immediate gains translate into lasting flexibility, easier daily movements, and a reduction in chronic tightness.
Ready to Unlock Your Flexibility?
Experience the benefits of PNF stretching with professional guidance at StretchMed Studios.
Reduce pain, move better, and reclaim your range of motion — safely and effectively.